In a standard install of Windows 7, you should find that System Restore is turned on by default, creating restore points automatically on a regular basis. But in case you want to manually create a System Restore point, perhaps just after a virus cleanup or before installing a new program, here’s how to do it.
There are a lot of different routes to the System Restore point creation screen in Windows 7, but this is the way I create a System Restore point.
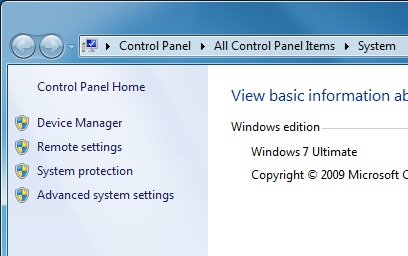
Click on the Start button and then right click on Computer. Select Properties from the context menu that pops up and the System window will open. This window displays a lot of basic information about your computer and the version of Microsoft Windows that has been installed on it.
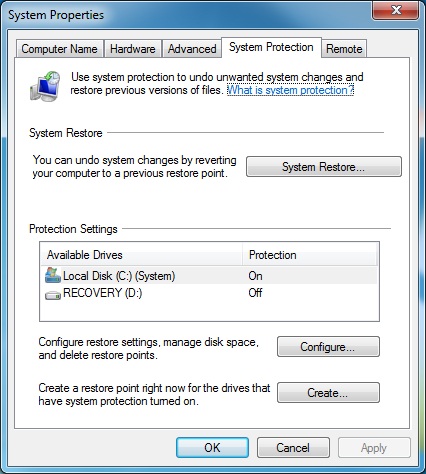
Click on System Protection on the left hand side of this window and the System Properties window will open, with the System Protection tab automatically pre-selected for you.
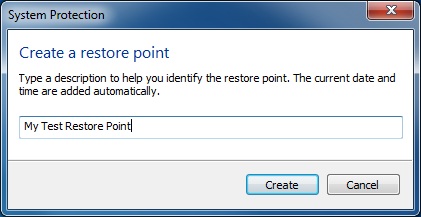
Click Create (near the bottom of the window) and you will be asked for a name to give to this System Restore point. Try to give it a meaningful name so that if you ever have to roll back to this restore point, you will recognise the name you used.
Finally, click Create and the System Restore point will be created for you. It might take a couple of minutes to complete, so just wait patiently until it finishes its work.
Hopefully you found this simple guide useful and you now know how to manually create a System Restore point in Microsoft Windows 7.


Great post, keeping me from working